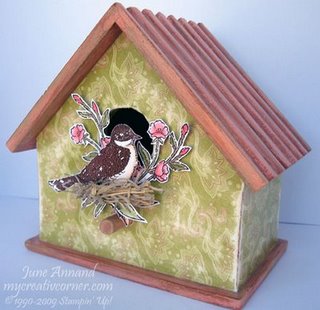
Altered Birdhouse
Supplies:
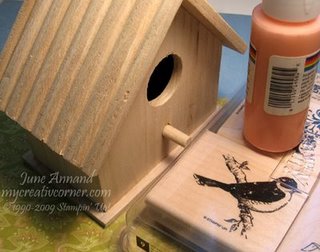
Unfinished birdhouse (available in Walmart’s craft section for a few dollars)
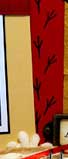
Designer patterned paper (Stampin’ Up! Raspberry Tart designer paper used here)
Modge Podge
Acrylic paints and brushes
Sanding block (for distressing)
Stamps and Inks (Stampin’ Up! “Friends 24-7” stamp set)
Embellishments (ie., raffia, ribbon, buttons, etc.)
Let’s get started –
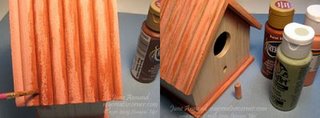
Paint a basecoat of acrylic paint on the birdhouse’s roof, bottom and post.
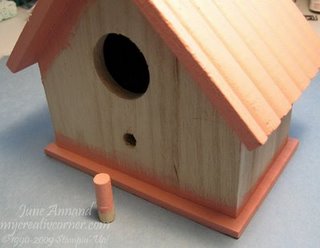
Add other paint colors (if necessary) -
To make an easy
template for cutting your patterned paper, use a sheet of printer copy paper and
trim it so it's slightly larger than the face of your birdhouse.
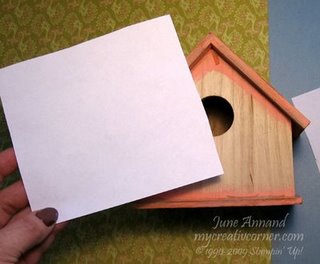
Line up one edge of the
paper along an edge and bottom of the birdhouse, then simply use your finger to
press a crease in the paper as shown below - you may need to trim off the bulky,
excess areas so that you can make a good crease. After you've creased your
edges, just trim off the extra paper with scissors to make your template.
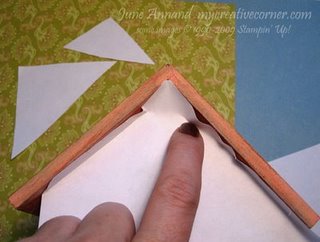
Put your template back
on the birdhouse and use your finger again to lightly crease an outline for the
holes in the center. Cut out the holes with scissors.
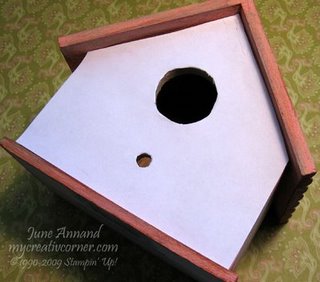
Use your template and
cut out 2 pieces from your patterned paper for the front and back. Remember to
cut holes for the front piece only!
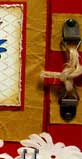
Measure and cut two rectangles from the patterned paper to fit the sides of the
birdhouse. Going in sections, apply a coat of ModgePodge to the birdhouse using
a small paintbrush, then lay the appropriate piece of patterned paper on it.
Press around the paper to make good contact with the glue. When all sides of the
paper are dry on the birdhouse, you can use a sanding block to distress the
paper. Lastly, apply a top coat of ModgePodge over the entire birdhouse.
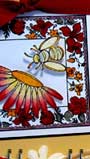
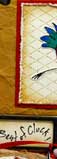
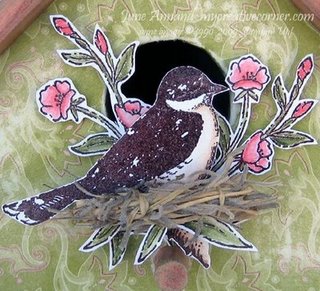
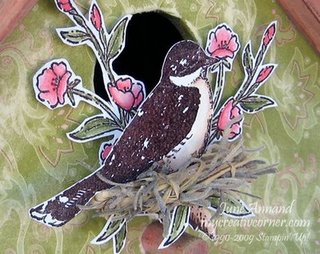
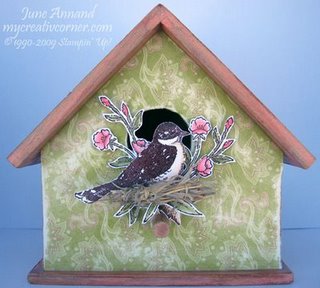
After the Modge Podge has dried, embellish your birdhouse as desired! (On
my birdhouse, I stamped the bird and flowers on Whisper White cardstock using
Staz-On brown, then immediately heat-embossed with clear embossing powder. These
were watercolored with markers and an aquapainter, then cut out. I created a
nest using a very thin strip of raffia and spanish moss. The flowers, bird and
nest were adhered to the birdhouse with dimensional popdots and mini gluedots.)
Here's an overall
picture again - straight on....
There you have it! I
hope you are inspired to create your own birdhouse today!
|
 |