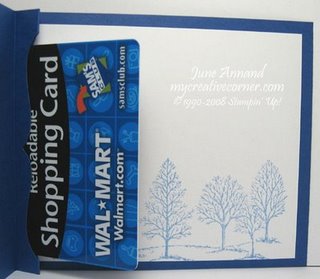
Here is a gift card holder using the BigShot and
Stampin’ Up!’s exclusive Top Note die to create a pocket that holds the gift
card on the inside as viewed below. Use the very edge of the Top Note die to cut
away and make the fancy scallop to create the gift card pocket.
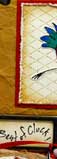
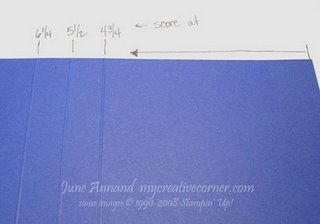
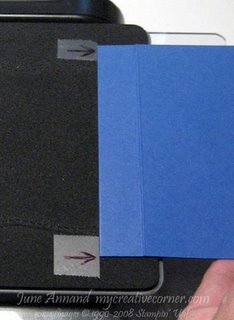
Cut the base cardstock in half lengthwise which will give you a sheet 4 1/4 x 11
inches. Measuring from one short side only, score at 4 3/4, 5 1/2 and 6 1/4
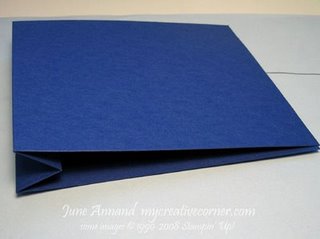
inches. Fold the card so that you create the flap on the inside - see pictures
below:
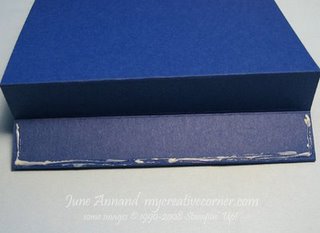
Use Mono-Multi glue on the outside edges
only to secure the flap together. Do not glue the
entire flap together because you'll glue the pocket that the gift card will
slide into! :)
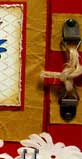
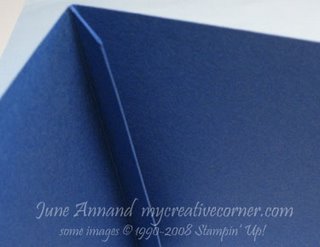
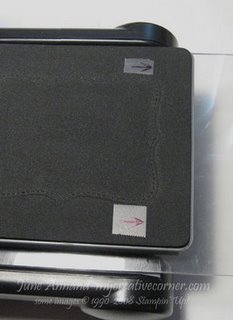
Once the glue sets, run the card through the Big Shot using the Top Note die.
Put a couple of pieces of tape along the edges of the die to guide and line up
the flap for cutting (see below). This way, the cut is even all the way down the
flap. (Tip to share: You may want to use additional repositionable tape to help
secure the card/flap to the die to keep it from sliding around while you cut
it.)
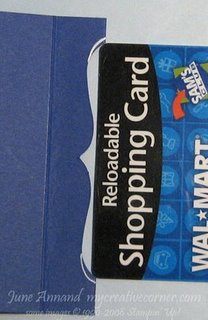
And Voila! Your pocket has been created....
Note - You may need to trim the edges of the curve about 1/8 inch on each side.
My gift card was just a smidge larger than the pocket cut-out... notice the
white lines of the gel pen in the above picture. I drew those in for you so see
how much I trimmed. I'm not sure if all gift card sizes are the same, so you may
or may not need to do this step.
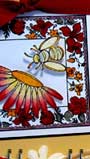
Decorate the remainder of the card.
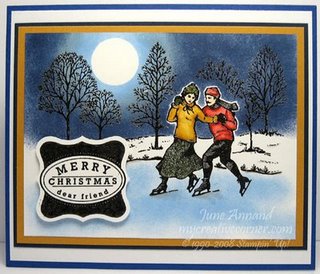
For the completed card above, I decorated the
front by stamping/heat-embossing the skaters from the Winter Post stamp set
(retired) in black ink and clear embossing powder. I masked the skaters and
stamped/heat-embossed the trees from the Lovely as a Tree stamp set the same
way. I used my 3/4 inch circle punch and a post-it note to create my moon mask.
Using another post-it note, I protected the snowy ground while I sponged the
night sky in Bashful Blue, Bordering Blue and Night of Navy inks. The post-its
were removed and I drew in the edge of the lake below the trees. The skaters
were watercolored with markers and an aquapainter. The ice was sponged in
Bashful Blue. Lastly, I heat-embossed the Christmas sentiment from the Curly
Label bundle and punched it out with the Curly Label punch. This sentiment was
popped up with dimensional popdots.